Overview:
Services
This is the part where you can access the service rather than pods. Pods can come and go. Example, you will create a deployment with 4 replicas. 1 pod was destroyed and new one was created so you need to access those pods dynamically.
Demo time!
So we will create a deployment first!
Running this command will:
- Create a deployment.
- A deployment that has 4 replicas/pods.
- Will run a container – a custom docker nginx container that just list the products (name and price)
linuxacademycontent/store-products:1.0.0 - Each pods/replicas will run on port 80
cat << EOF | kubectl apply -f -
apiVersion: apps/v1
kind: Deployment
metadata:
  name: store-products
  labels:
    app: store-products
spec:
  replicas: 4
  selector:
    matchLabels:
      app: store-products
  template:
    metadata:
      labels:
        app: store-products
    spec:
      containers:
      - name: store-products
        image: linuxacademycontent/store-products:1.0.0
        ports:
        - containerPort: 80
EOF
Now it is time to create a Kubernetes service. The command below will:
- Create a Kubernetes service so that it allows you to dynamically access a group of replica pods
- That service
store-productwill run and listen on port 80 - It will target the pods that has the selector
store-products(see screenshot above we got 4 pods with the pod namestore-products)
cat << EOF | kubectl apply -f -
kind: Service
apiVersion: v1
metadata:
  name: store-products
spec:
  selector:
    app: store-products
  ports:
  - protocol: TCP
    port: 80
    targetPort: 80
EOF
Now you can access that specific web server IP from your master node machine to retrieve the products
curl 10.104.68.196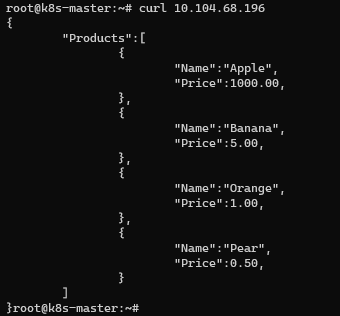
You can also access that web server service called store-products from a pod. Below is a demo where we run a command curl store-products inside the pod called busybox
kubectl exec busybox -- curl store-products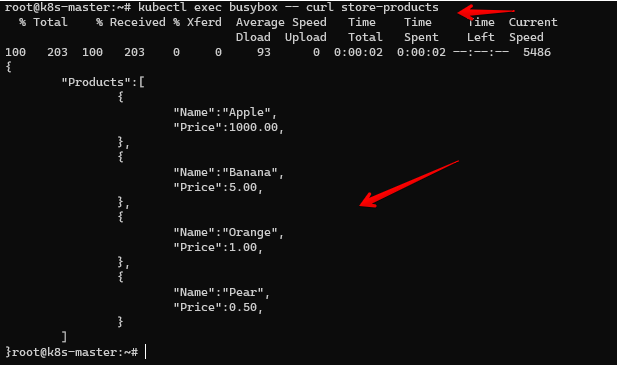
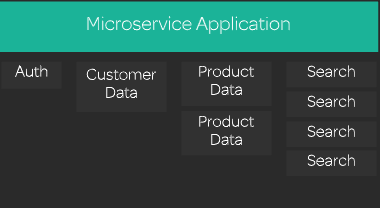
Microservices
Kubernetes Microservices is where small, independent services work together to form a whole application.
Example of small services:
- mysql – to store database like users,
- add to cart service (like a web code that process the add product to cart website)
- search service (like a web code that handles all the search queries)
Demo time!
We will use an existing and working YAML files to demo this Kubernetes microservices. This is from Linux Academy so we’ll download those YAML files.
The commands below will clone the robot shop store and make sure we are in our home directory.
cd ~/
git clone https://github.com/linuxacademy/robot-shop.git
This is what the robot shop directory looks like.
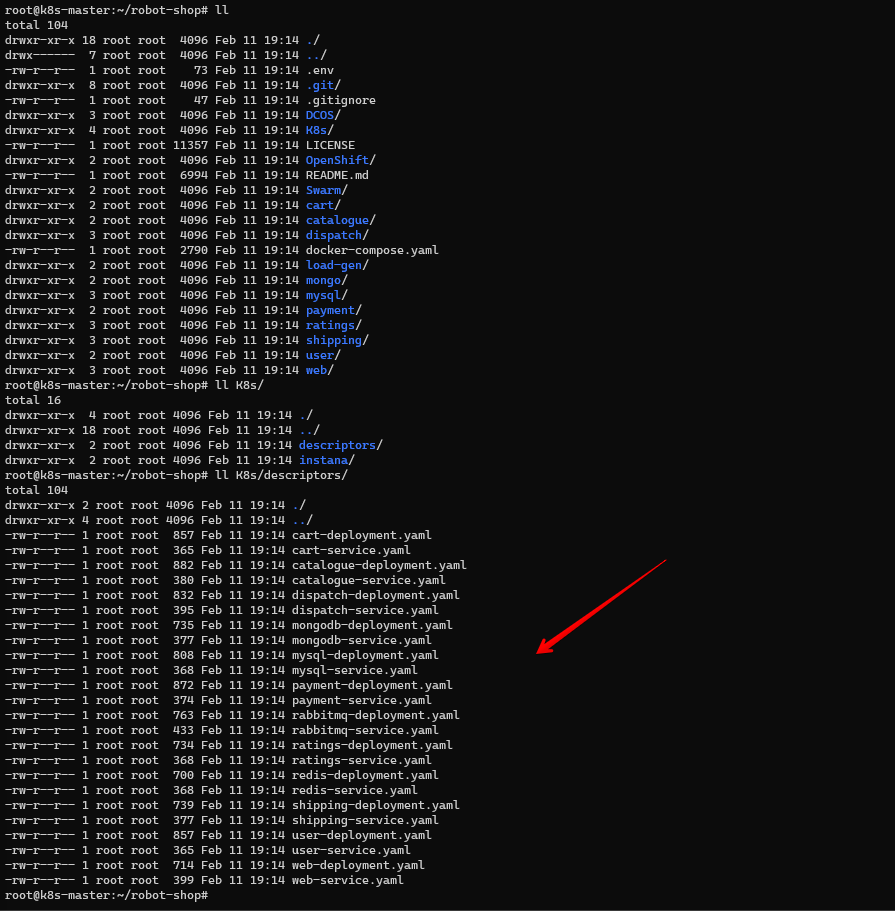
We’ll create a name space first so we can easily track/get info from this microservice.
kubectl create namespace robot-shopDeploy the application objects (those YAML files from the screenshot above) to that name space robot-shop using the deployment descriptors from the git repo/robot-shop folder descriptor
Note:
I had to run these commands to tweak the robot-shop repo to fix the
# Replace apiVersion to apps/v1
sed -i 's/extensions\/v1beta1/apps\/v1/g' /root/robot-shop/K8s/descriptors/*.yaml

# Add selector label
for FILE in /root/robot-shop/K8s/descriptors/*; do VAL=$(grep io.kompose.service $FILE | head -1 | awk '{print $2}');echo $VAL;sed -i "/replicas/i \  selector:\n\    matchLabels:\n\      io.kompose.service: $VAL" $FILE; done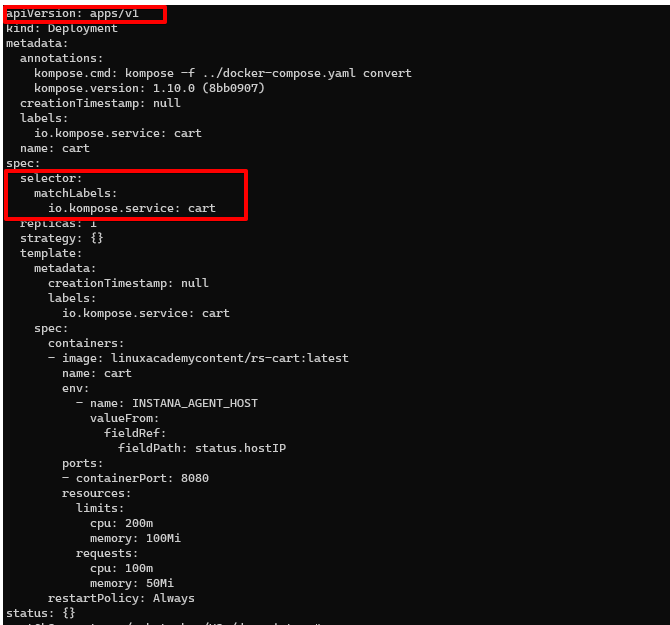
Then run time to deploy the application objects to the namespace using the deployment descriptors from the Git repository
kubectl -n robot-shop create -f ~/robot-shop/K8s/descriptors/
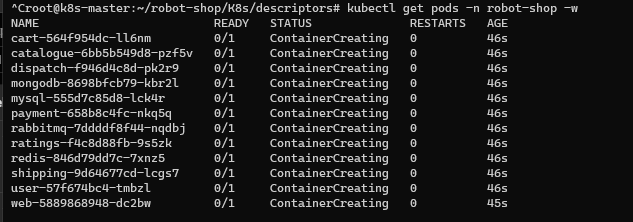
Check the pods of this microservices deployment. You have to specify the name space robot-shop
kubectl get pods -n robot-shop -w