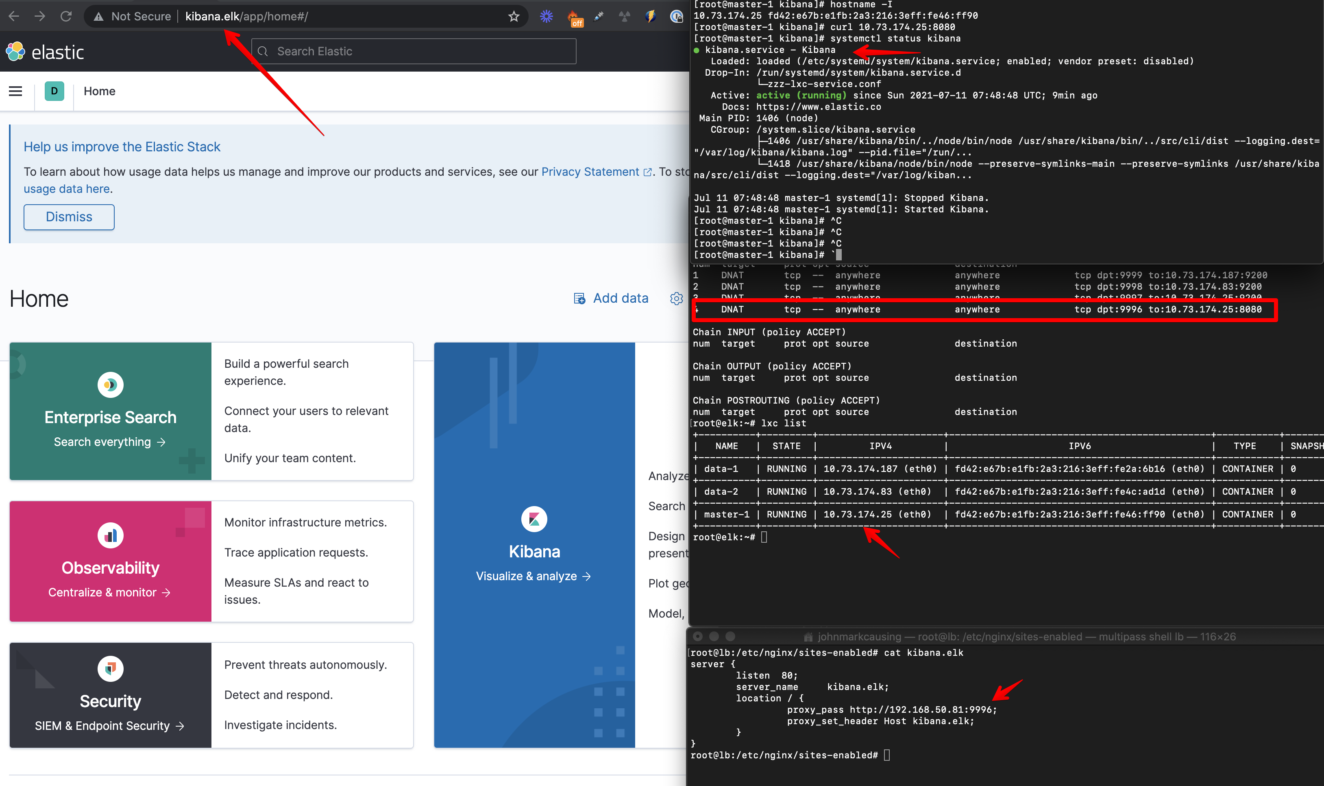
Here are the steps to install Kibana. This is a continuation of our Part 1 tutorial here
Localhost MacOS hostfile
16:10:05:~ % grep kibana /private/etc/hosts
192.168.50.27 master.elk data-1.elk data-2.elk kibana.elk
LXD Server: We added iptables to redirect traffic from LB to LXD:
root@elk:~# iptables -A PREROUTING -t nat -p tcp --dport 9996 -j DNAT --to 10.73.174.25:8080LB server: Nginx config for kibana.elk domain
root@lb:/etc/nginx/sites-enabled# cat kibana.elk
server {
        listen  80;
        server_name     kibana.elk;
        location / {
                 proxy_pass https://192.168.50.81:9996;
		 proxy_set_header Host kibana.elk;
        }
}
LXC ‘master-1’: Kibana install and setup the yml file
wget https://artifacts.elastic.co/downloads/kibana/kibana-7.13.3-x86_64.rpm
shasum -a 512 kibana-7.13.3-x86_64.rpm
sudo rpm --install kibana-7.13.3-x86_64.rpm
These are the only lines I changed in the /etc/kibana/kibana.yml file:
server.port: 8080

# This is the IP of the LXC Container 'master-1'
server.host: "10.73.174.25"

# username is the default. The password is the one you setup from the part one tutorial (/usr/share/elasticsearch/bin/elasticsearch-setup-passwords interactive)
elasticsearch.username: "kibana"
elasticsearch.password: "password88123818"
Results after installing Kibana
